Overview
Workpapers can be added to a tax return at both an account level, and an entity level. Workpapers are used to make adjustments to income tax calculations, ensuring accurate tax reporting. Workpapers will roll to the next tax year once they have been added, allowing you to retain information about previous tax movements.
Add a workpaper to an account
- From the entity's tax year summary select Workpapers > Accounts > Trial balance.
- Next to the account > select Add workpaper.
- From the drop down menu > select the workpaper required for the account.

- Select the account or workpaper name to open it.
- Enter your required adjustments.
- Optional:
- Edit the Tax narration.
- Edit the tax form disclosure.
- Add a note, file or query.
Add a workpaper to an entity
- Navigate to Workpapers > Workpapers.
- Click New Workpaper.
- From the drop-down menu select the required workpaper.

- Add the required adjustment into the relevant field(s).
- Optional: Edit the tax form disclosure.
- Optional: Add a note, file or query.
The tax form disclosure
Using workpapers, you can determine where income is disclosed in the tax return. If a workpaper isn't added to an account, the software will select a tax form disclosure by default. For accounts you will be able to edit this by selecting the name of the account and selecting a different disclosure from the dropdown list. For specific workpapers (such as residential rental income, interest income), the workpaper is linked directly to a tax form disclosure and is unable to be edited.

Selecting the hyperlink 'Tax form disclosure' takes you directly into the income tax return, so you can see how the income will be disclosed.

Workpaper narrations
Each workpaper includes a narration. By default, the narration is populated from the name of the account the workpaper is attached to. In the example below, the user has attached an interest income workpaper to an account called Interest, so the narration has defaulted to Interest:

Narrations are used in the tax return.
The activity log
Each workpaper includes an activity log that provides a full audit trail of all actions taken on the account.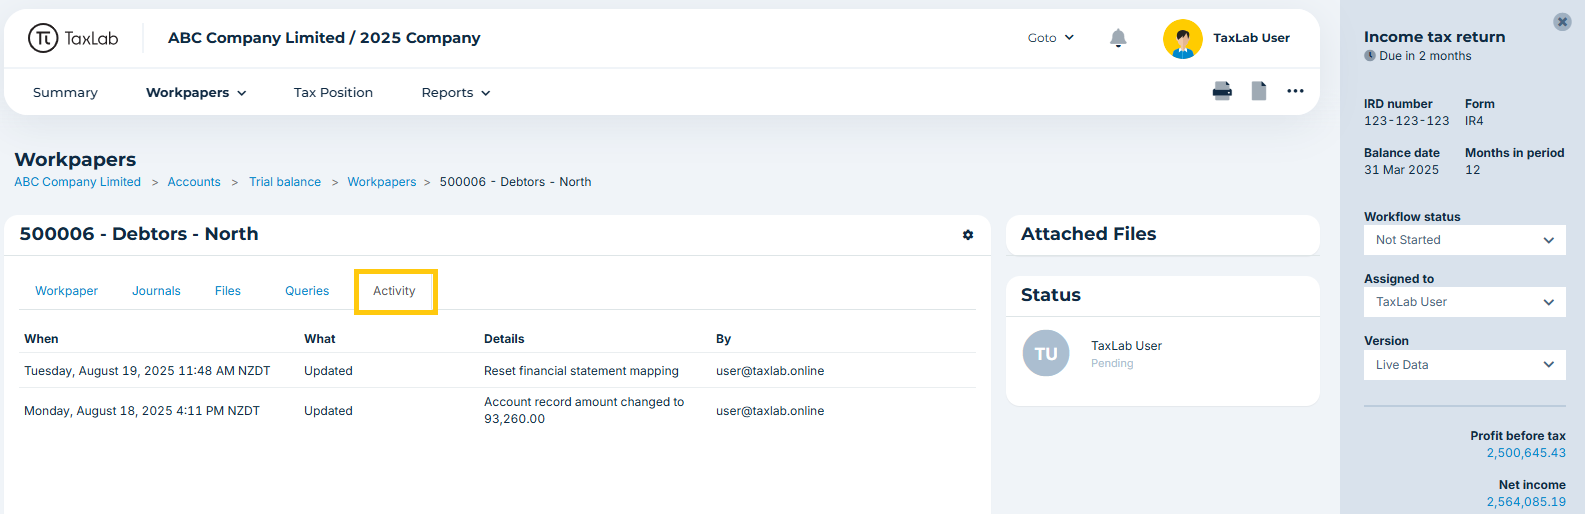
Unlink a workpaper from an account
If you added a workpaper to an account but no longer want to associate the workpaper with that account, you can move the workpaper to the entity level.
- Navigate to Workpapers > Workpapers.
- Click the workpaper you want to unlink (move).
- Click the Settings icon > Move to Not in accounts.
Remove a workpaper
There are two ways to remove a workpaper.
Method one
- Navigate to Workpapers > Workpapers.
- Click the workpaper you want to remove.
- Click the Settings icon > Remove workpaper from this tax year.
Method two
- Navigate to Workpapers > Accounts > Trial balance.
- Locate the account that has the workpaper you want to remove.
- Click the Settings icon for the account then click Remove workpaper from this tax year.
Troubleshooting
Unable to remove workpaper
This will occur when an account with a workpaper is included in a prior year that is a read-only editing mode.
To resolve this:
- Use the Goto menu to navigate to the earliest year the account appears.
- Open the More... menu > Click Settings.
- Change Editing mode to Read-write.
- Return back to your current year to remove the workpaper.
Once this has been done you can update the editing mode of the prior years back to Read-only.
What's next?
Learn about adding a query, comment or signoff to a workpaper.
Related articles
Was this article helpful?
That’s Great!
Thank you for your feedback
Sorry! We couldn't be helpful
Thank you for your feedback
Feedback sent
We appreciate your effort and will try to fix the article